
Singer 99K Manual: A Comprehensive Guide
Discover detailed guides, PDF manuals, wiring diagrams, and restoration tips for the iconic Singer 99K sewing machine, spanning decades of sewing history!
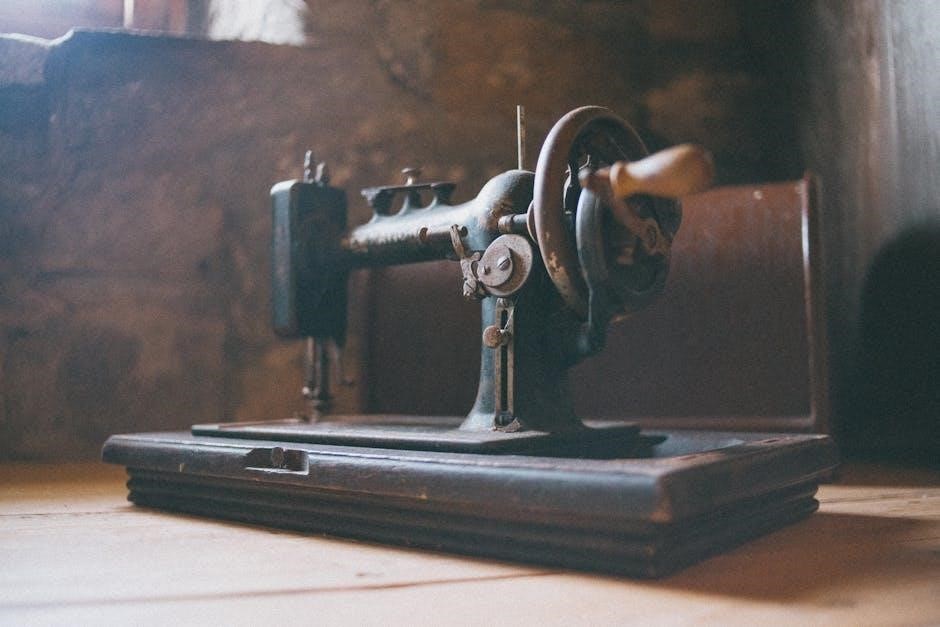
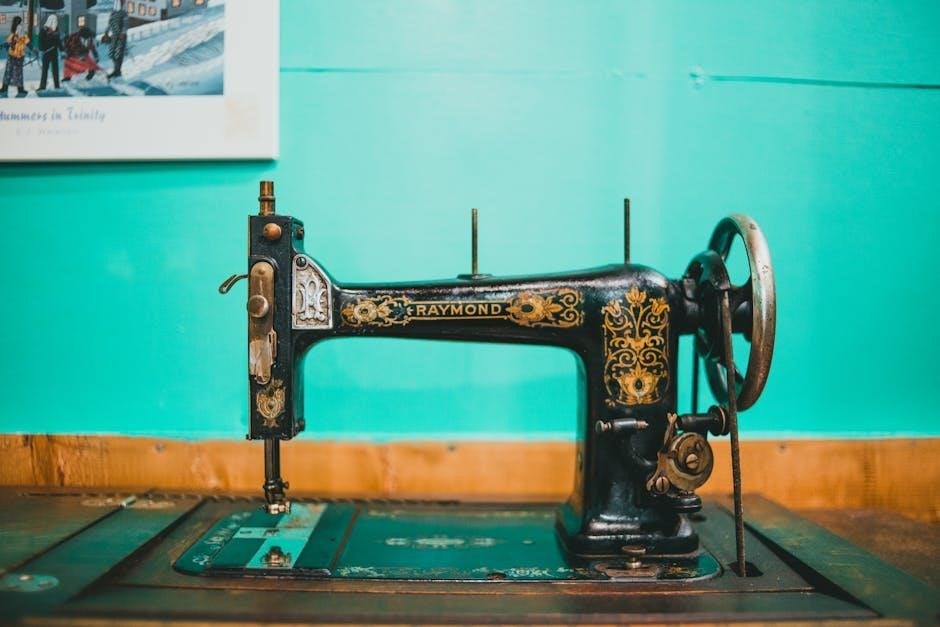
The Singer 99K, a cornerstone of vintage sewing machines, represents a blend of robust engineering and elegant design. Introduced in 1911, it quickly became a favorite among home sewers and professionals alike, renowned for its durability and versatility. This machine, often found with its distinctive aluminum body, offered a significant upgrade over earlier models.
Numerous manuals and guides, including comprehensive 56-page versions, are available today, often in PDF format, catering to both novice and experienced users. These resources detail everything from basic operation to advanced techniques. The 99K’s enduring popularity is reflected in the continued demand for original manuals and replacement parts, ensuring this classic machine remains a vibrant part of the sewing community.
Historical Context of the Singer 99K
Emerging in 1911, the Singer 99K arrived during a period of significant social and technological change. It represented Singer’s response to growing demand for a lighter, more portable sewing machine suitable for home use. Preceding models were often heavier and geared towards industrial settings. The “99” and subsequent “99K” (with knee lift) quickly gained prominence, becoming a staple in households throughout the early to mid-20th century.
Original manuals, now valuable collectibles, reflect the sewing practices of the era. The availability of PDF versions of these manuals today allows enthusiasts to connect with the machine’s history. Its longevity, evidenced by continued restoration efforts and parts availability, underscores its lasting impact on sewing technology and domestic life.
Key Features and Specifications
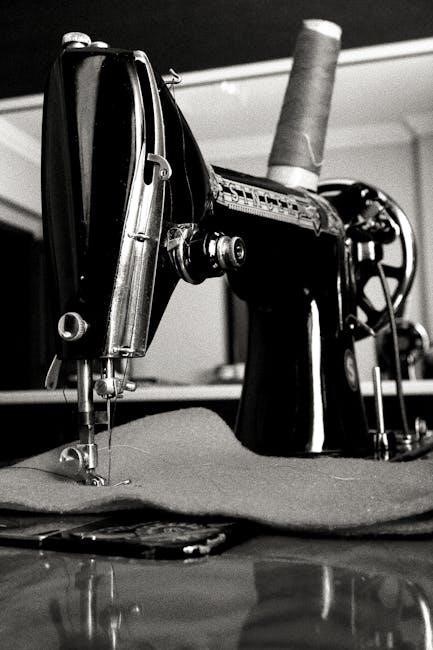
The Singer 99K is a three-quarter size, zig-zag capable sewing machine renowned for its robust construction and smooth operation. It features a distinctive aluminum body and a powerful motor, initially available in both electric and treadle versions. Key specifications include a maximum stitch width of 5mm and a maximum stitch length of 4mm.
Original manuals detail its ability to handle a variety of fabrics, from lightweight cottons to heavier denims. The machine’s versatility, coupled with readily available attachments, made it a favorite among seamstresses. PDF manuals often showcase the range of stitches and accessories, highlighting its adaptability for diverse sewing projects.
Understanding the Machine Components
Explore the Singer 99K’s inner workings – from the handwheel and presser foot to the bobbin case and motor – with detailed manual illustrations.

Identifying Major Parts
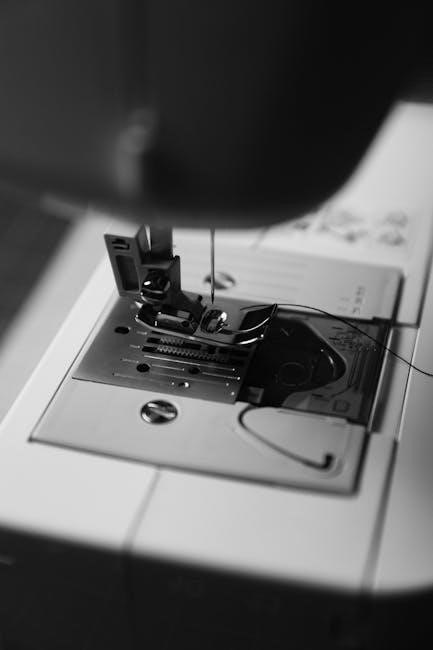
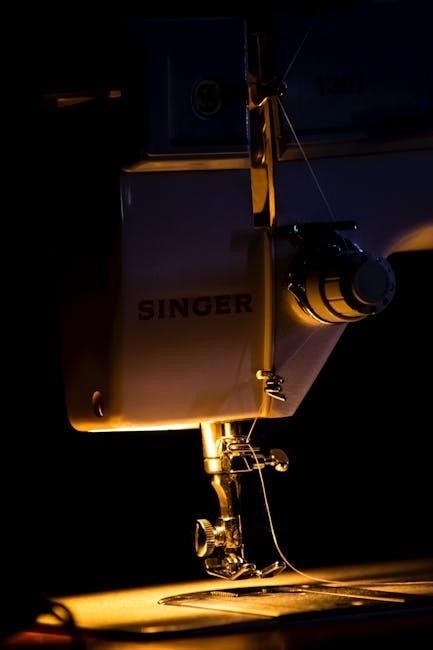
Familiarizing yourself with the Singer 99K’s components is crucial for operation and maintenance. Key parts include the handwheel, used for raising and lowering the needle; the presser foot, which holds fabric in place; and the presser bar, controlling pressure. The needle clamp secures the needle, while the bobbin winder prepares the bobbin for stitching.
Essential elements also encompass the bobbin case, housing the lower thread, and the feed dogs, advancing fabric under the needle. The tension discs regulate thread tension, impacting stitch quality. Don’t overlook the spool pin, supporting the thread spool, and the reverse lever, enabling backward stitching. Refer to your manual’s diagrams for precise locations and functions of each part, ensuring proper assembly and troubleshooting.
Bobbin Winding and Insertion
Proper bobbin winding is vital for consistent stitching. Begin by placing the spool of thread on the spool pin and guiding it through the thread guides. Engage the bobbin winder by sliding it into position. Wind the thread several times around the bobbin before starting, ensuring even distribution. Once full, disengage the winder and trim the thread.
For insertion, locate the bobbin case. Open it and insert the wound bobbin, ensuring the thread unwinds in the correct direction – typically clockwise. Guide the thread through the tension spring and out through the slot. Close the bobbin case and gently pull the thread to confirm proper engagement. Incorrect insertion can cause tension issues and skipped stitches.
Thread Path and Tension Adjustment
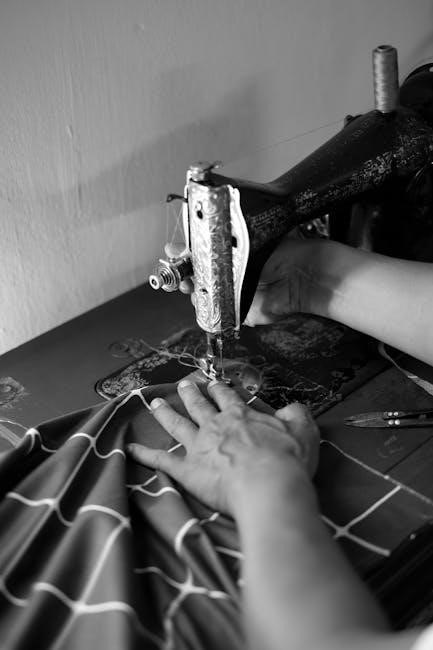
Follow the thread path meticulously, starting from the spool pin, through the thread guides, and down to the take-up lever. Ensure the thread is securely seated in each guide to prevent skipping. Next, thread the needle from front to back. Proper threading is crucial for smooth operation.
Tension adjustment is key to balanced stitches. The Singer 99K features a tension dial. Higher numbers increase tension, ideal for thicker fabrics, while lower numbers are for lighter materials. Test stitch on scrap fabric and adjust until the top and bobbin threads meet evenly in the middle of the fabric. Incorrect tension leads to looping or puckering.
Operating the Singer 99K
Master basic sewing, stitch selection, and reverse stitching with your Singer 99K; achieve professional results through proper technique and machine understanding.
Basic Sewing Techniques
Embark on your sewing journey with the Singer 99K by first understanding fundamental techniques. Begin with practicing straight stitches on scrap fabric, ensuring consistent seam allowances. Learn to backstitch at the beginning and end of seams for secure finishing. Mastering these basics is crucial before tackling more complex projects.
Proper fabric handling is key; guide the fabric gently, avoiding pulling or pushing. Maintain a consistent sewing speed for even stitches. Experiment with different thread types and weights to achieve desired results. Regularly check your stitch tension to prevent puckering or loose seams. Remember to always use the correct needle size for your fabric type.
Finally, practice pivoting corners smoothly for professional-looking results. These foundational skills will build confidence and allow you to fully utilize the Singer 99K’s capabilities.
Stitch Selection and Length Adjustment
The Singer 99K primarily focuses on straight stitching, a hallmark of its durable construction. However, understanding stitch length adjustment is vital for varied projects. Utilize the stitch length lever to select finer stitches for delicate fabrics and longer stitches for heavier materials.
Experiment with different stitch lengths on scrap fabric to observe the impact on seam strength and appearance. A shorter stitch length provides greater security, ideal for stress points, while a longer length is suitable for gathering or basting. Always test your settings before sewing your final project.
Remember that consistent stitch length contributes to a professional finish. Adjustments should be made carefully, considering the fabric weight and intended use of the garment or item being created.
Reverse Stitching Mechanism
The Singer 99K’s reverse mechanism is elegantly simple, employing a lever located conveniently near the handwheel. Engaging this lever alters the machine’s timing, causing the needle to move backward, reinforcing seams at the beginning and end.
To reverse stitch, lift the lever before reaching the end of your seam, sew backward for the desired length, and then release the lever to return to forward stitching. Avoid prolonged reverse sewing, as it can strain the mechanism and potentially damage the gears.
Practice using the reverse lever to achieve neat, secure backstitching. Consistent pressure and smooth lever operation are key to preventing skipped stitches or uneven reinforcement.
Maintenance and Troubleshooting
Ensure longevity with regular cleaning, oiling, and solutions for common issues like thread jams or belt replacements – keep your Singer 99K running smoothly!
Regular Cleaning and Oiling
Maintaining your Singer 99K requires consistent cleaning and lubrication for optimal performance. Dust and lint accumulate, hindering smooth operation, so regularly brush away debris from the bobbin area, feed dogs, and surrounding mechanisms. A soft brush or compressed air is ideal.
Oiling is crucial; use a quality sewing machine oil, applying it to all moving parts – the motor, gears, and linkages. Avoid over-oiling, as excess oil attracts dust. Focus on points indicated in your manual. After oiling, run the machine briefly to distribute the lubricant.
Frequency depends on usage, but a quick clean after each sewing session and a thorough oiling every six months is recommended. Proper maintenance prevents wear and tear, extending the life of your vintage Singer 99K.
Common Problems and Solutions
Encountering issues with your Singer 99K is common, but often easily resolved. Skipped stitches frequently indicate incorrect threading or a dull needle – replace the needle and re-thread carefully. If the machine jams, check for lint buildup around the bobbin case and feed dogs; clean thoroughly.
Tension problems result in uneven stitches. Adjust the tension dial incrementally, testing on scrap fabric after each adjustment. A noisy machine may signal a need for oiling or a worn belt. If the motor hums but doesn’t run, check the power cord and belt connection.
Consult your manual for detailed troubleshooting steps and diagrams. Online forums dedicated to vintage Singer machines also offer valuable advice and support from experienced users.
Belt Replacement Guide
Replacing the belt on your Singer 99K restores power transmission. First, disconnect the machine from power! Remove the handwheel and motor bracket screws, carefully noting their positions. Gently ease the old belt off the motor pulley and flywheel.
Install the new belt, ensuring a snug but not overly tight fit around both pulleys. Reattach the motor bracket and handwheel, tightening the screws securely. Verify the belt alignment before reconnecting power.
A properly installed belt should run smoothly without slipping. If slippage occurs, slightly tighten the motor bracket screws. Refer to your manual’s diagrams for visual guidance. Always use a belt specifically designed for the Singer 99K for optimal performance.
Advanced Techniques & Resources
Explore specialized attachments, original manuals in PDF format, and detailed wiring diagrams to unlock the full potential of your Singer 99K.
Using Attachments and Accessories
The Singer 99K’s versatility truly shines when utilizing its wide array of available attachments and accessories. These tools expanded the machine’s capabilities beyond basic straight stitching, allowing for decorative work, specialized seams, and efficient fabric manipulation. Common attachments included various presser feet – a rolled hem foot for delicate edges, a zipper foot for precise zipper insertion, and a darning foot for repairing worn fabrics.
Additionally, gather sets and hemmers enabled intricate hem finishes, while edge stitchers created professional-looking details. Original Singer catalogs and manuals detail each attachment’s specific use and setup. Sourcing these vintage accessories can enhance your sewing experience and unlock creative possibilities with your Singer 99K, mirroring the techniques employed by seamstresses of the past.
Finding Original Manuals and Guides (PDF Downloads)
Locating original Singer 99K manuals in PDF format is crucial for proper operation and maintenance. Numerous online resources archive these valuable documents, offering detailed instructions and diagrams. Websites specializing in vintage sewing machine manuals often host downloadable PDFs, sometimes requiring free registration. Internet Archive and similar digital libraries are excellent starting points for your search.
Be cautious of websites offering manuals for a fee; many legitimate sources provide them freely. Ensure the PDF is a genuine Singer document, checking for correct model numbers and illustrations. Having a digital copy readily available simplifies troubleshooting and ensures you’re utilizing your Singer 99K according to its original design specifications.
Singer 99K Wiring Diagrams
Understanding the Singer 99K’s wiring is essential for electrical repairs and ensuring safe operation. Original wiring diagrams depict the connections between the motor, foot controller, and various machine components. These diagrams are invaluable when troubleshooting electrical issues like a non-functioning motor or faulty wiring. Several online resources archive these diagrams, often as part of larger service manuals or repair guides.
Always disconnect the machine from power before attempting any electrical work. Carefully compare the diagram to your machine’s wiring, noting color codes and terminal connections. If unsure, consult a qualified electrician to avoid electrical shock or damage to the sewing machine.
Restoration and Repair
Revive your Singer 99K with guides on identifying wear, sourcing parts, and refurbishing the exterior – preserving its vintage charm and functionality!
Identifying Wear and Tear
Assessing the condition of your Singer 99K is crucial before embarking on restoration. Begin by examining the machine’s exterior for chipped paint, rust, or dents, noting areas needing attention. Inspect the handwheel for smooth rotation and listen for unusual noises. Check the bobbin area for lint buildup and signs of corrosion.
Pay close attention to the presser foot, needle bar, and feed dogs, looking for wear or bending. Evaluate the belt for cracks or stretching, as this impacts power transmission. Test the tension discs for consistent pressure. Finally, scrutinize the wiring for fraying or damage, ensuring electrical safety. Documenting all identified issues will streamline the repair process and parts sourcing.
Sourcing Replacement Parts
Finding original Singer 99K parts can be challenging, but several avenues exist. Online marketplaces like eBay often host listings from vintage sewing machine specialists and individual sellers. Dedicated sewing machine parts retailers, both online and brick-and-mortar, frequently stock components for popular models like the 99K.
Consider joining online Singer sewing machine forums and communities; members often share resources and leads on hard-to-find parts. Explore sewing machine repair shops, as they may have salvaged parts from previous restorations. Be prepared to compare part numbers and carefully inspect the condition of used components before purchasing. Patience and diligent searching are key to a successful parts hunt!
Refurbishing the Machine’s Exterior
Restoring the Singer 99K’s exterior involves careful cleaning and, potentially, refinishing. Begin by gently removing dust and grime with a soft cloth and mild soap solution. For stubborn dirt, use a specialized sewing machine cleaner. Avoid abrasive cleaners that could damage the paint or decals.
If the paint is chipped or faded, consider professional refinishing to match the original color. Decals can be carefully cleaned or, if damaged, replicated by specialist companies. Polish the chrome parts with a metal polish to restore their shine. Remember to protect the machine with a light coat of wax after cleaning and polishing to preserve its appearance.

Singer 99K vs. Other Vintage Models
Compare the Singer 99K to similar models like the Singer 99 and Kenmore 158.1813, noting differences in features, build quality, and available resources.
Comparison with Singer 99
The Singer 99 and 99K, while closely related, possess distinct characteristics. The Singer 99, predating the 99K, generally features a simpler construction and fewer decorative capabilities. The 99K, introduced later, boasts a more refined mechanism, including a more adaptable reverse lever and enhanced stitch options.
Notably, the 99K often includes a built-in motor option, absent in most standard Singer 99 models. Both machines share a similar robust build quality and utilize the same basic components, making parts interchangeability relatively common. However, the 99K’s improvements cater to a broader range of sewing applications, offering greater versatility for both novice and experienced sewers. Ultimately, the 99K represents an evolution of the original Singer 99 design.
Comparison with Kenmore 158.1813
The Kenmore 158.1813 is essentially a rebranded Singer 99K, manufactured by Singer under a licensing agreement for Sears. Consequently, they share nearly identical internal mechanisms, components, and capabilities. Manuals and parts are often interchangeable, simplifying maintenance and repair.
However, cosmetic differences exist; Kenmore models feature distinct badging and sometimes different cabinet options. While functionally the same, Kenmore machines may exhibit variations in the original finish or included accessories. Owners of either machine can utilize the same resources – Singer 99K manuals, parts diagrams, and online communities – for support. Choosing between the two often comes down to aesthetic preference or price.